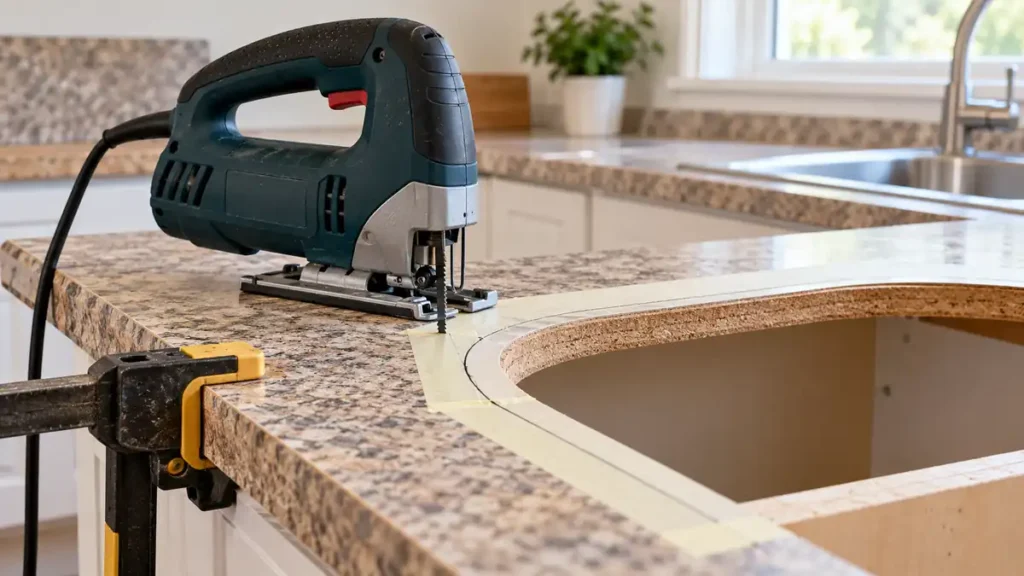
A jigsaw is well suited to sink and cooktop cutouts in laminate countertops because it can follow straight lines and rounded corners. Use a compatible fine-cut blade intended for laminate or laminated wood products, support the countertop securely, drill starter holes for internal cutouts, and guide the saw without forcing it. Tooth direction matters: a conventional up-cut blade tends to chip the top surface, while a reverse-tooth blade places more cutting pressure against the jigsaw’s shoe and requires firm control.
These methods apply to laminate bonded over a wood-based substrate such as particleboard or MDF. Solid-surface, stone, quartz, tile, and metal countertops require different tools and cutting procedures.
Before starting a countertop cutout, compare jigsaw blades for laminate countertops and select a tooth direction suited to the visible face.
Tools and Materials
- Electric jigsaw with the owner’s manual available
- Compatible blade intended for laminate or laminated wood products
- Drill and bit large enough to create blade-entry holes
- Sink, cooktop, or appliance manufacturer’s cutout template
- Tape measure, square, pencil, and straightedge
- Painter’s tape or masking tape for marking and surface protection
- Clamps and stable work supports
- Sacrificial boards, cleats, or other support for the cutout
- Eye and hearing protection
- Suitable dust protection and dust collection where practical
Check that the blade shank matches the jigsaw’s blade clamp. T-Shank and U-Shank interfaces are not automatically interchangeable. The blade also needs enough usable cutting length to pass through the countertop throughout the full stroke without striking the support surface below.
If the countertop is solid surface rather than laminate, check laminate and solid-surface countertop differences before choosing the blade or procedure.
How to Cut a Laminate Countertop With a Jigsaw
-
Confirm the countertop material and cutout dimensions.
Identify the core material before cutting. Use the appliance or fixture manufacturer’s template rather than tracing the outside edge of a sink or cooktop. A traced rim usually does not represent the required opening. Check the location from above and below for cabinet walls, drawer hardware, mounting rails, plumbing, wiring, and sink clips.
-
Choose which face will be visible during the cut.
Most conventional jigsaw blades cut on the upstroke, which can pull chips from the surface facing the tool. For a straight trim cut with a conventional blade, cutting from the underside can protect the decorative top face. For an installed countertop or a cutout that must be made from above, use a blade and technique suited to that orientation. Reverse-tooth blades can reduce top-surface tear-out, but they apply upward force to the saw and require the shoe to be held firmly against the work.
-
Apply tape and mark the cutting line.
Place painter’s tape over the cutting area, then draw the line or attach the template over the tape. The tape protects the surface from pencil marks and minor shoe scuffs. It may help control small chips, but it cannot guarantee a chip-free edge.
-
Support and clamp the countertop.
Place the countertop on stable supports with open clearance beneath the complete blade path. Clamp it so it cannot shift or vibrate. Make sure the blade cannot contact a workbench, cabinet brace, clamp, or hidden obstruction.
-
Support the waste section.
For a sink or cooktop opening, attach temporary cleats below the cutout or support it on sacrificial boards that stay clear of the blade. The center section can become heavy and unstable near the end of the cut. If it drops, it may break the remaining substrate, chip the laminate, bind the blade, or damage the surrounding countertop.
-
Drill starter holes inside an internal cutout.
Disconnect the jigsaw from power or remove its battery before setup and blade installation, following the manufacturer’s instructions. Drill each starter hole inside the waste area, positioned so the outside edge of the finished cut remains intact. The opening must accept the blade without requiring it to bend or scrape against the hole. Drilling at the corners can also establish a controlled corner radius.
-
Install the blade and adjust the saw.
Secure the correct blade in the clamp and confirm that it is properly seated. Start with orbital action off or at a low setting when cut quality is the priority. Orbital controls differ among jigsaws, so use the tool manual and blade manufacturer’s guidance. Select a controllable speed appropriate for the blade and countertop material rather than automatically using the maximum setting.
-
Start with the blade clear of the material.
Insert the stationary blade into a starter hole and set the baseplate flat on the laminate. Keep the blade away from the hole’s edge, start the tool, and allow it to reach the selected speed before feeding it into the cut. Avoid plunge cutting unless the jigsaw and blade manufacturer specifically support that technique.
-
Guide the jigsaw along the waste side of the line.
Maintain full baseplate contact and use steady forward pressure. Let the blade cut at its own pace. Excessive pressure can bend the blade, create an angled cut through the substrate, increase chipping, or cause the saw to wander. Keep the kerf on the waste side so minor corrections do not enlarge the finished opening beyond the template.
-
Turn corners without twisting the blade.
Slow the feed rate as the blade enters a curve. Pivot the saw gradually while keeping the baseplate flat. If the required corner is tighter than the blade can follow comfortably, stop and approach it from another starter hole or make relief cuts within the waste. Forcing the saw sideways can deflect or damage the blade.
-
Secure the cutout before completing the final section.
Pause before the waste piece becomes fully detached and verify that its supports are holding it. A helper may stabilize a large section from a safe position away from the blade path, but hands must never be placed beneath or near the active cut. Finish the remaining section slowly and allow the blade to stop before lifting the saw.
-
Inspect and finish the opening.
Remove the waste section and check the cut for blade deflection, loose laminate, and local chipping. Make small corrections with an appropriate file or abrasive rather than forcing the jigsaw back through a narrow area. Follow the sink, cooktop, and countertop manufacturer’s directions for sealing exposed substrate edges, mounting hardware, and clearances.
Selecting a Blade for Laminate Countertops
The blade must fit the jigsaw and match the countertop construction. Packaging or manufacturer application charts may identify blades for laminate, laminated particleboard, kitchen worktops, or clean cuts in wood-based panels.
Tooth Direction
- Conventional up-cut blade: Cuts primarily on the upward stroke. It tends to pull the jigsaw’s baseplate against the work, but the surface facing the tool is more vulnerable to chipping. Cutting from the underside can place the decorative face on the cleaner side of the cut.
- Reverse-tooth or down-cut blade: Cuts primarily on the downward stroke. It can protect the surface facing the tool, which is useful for top-side cutouts. The cutting force can push the saw away from the work, so firm baseplate contact is critical.
- Specialized laminate blade: May use tooth geometry intended to reduce chipping in laminated panels. Follow its marked cutting direction and material range rather than assuming every laminate blade behaves identically.
If a down-cutting profile is appropriate for the visible face, compare reverse-cut jigsaw blade options and keep the shoe firmly supported.
Blade Width, Stiffness, and Working Length
A wider, stiffer blade generally tracks straighter through a thick countertop substrate, while a narrower blade follows curves more easily. A blade that is too flexible can follow the marked line at the top while producing an angled edge below it.
Check usable cutting length rather than total blade length. At the upper end of the jigsaw’s stroke, the blade still needs to extend through the entire countertop with safe clearance. A long blade alone does not ensure a square cut.
Use the process for checking blade length and cutting profile before starting the finished countertop.
Tooth Pitch
Fine tooth spacing commonly produces a more controlled edge in laminate and wood-based countertop cores, but extremely fine teeth can clear debris slowly in thick material. Use the blade manufacturer’s material and thickness range. A generic TPI rule cannot account for every blade design or countertop construction.
Reducing Chips and Surface Damage
Laminate is brittle compared with the particleboard or MDF beneath it. Several measures can limit visible damage:
- Use a sharp blade specified for laminated material.
- Orient the finished face according to the blade’s tooth direction.
- Keep the jigsaw shoe flat and stable through the entire cut.
- Use low or no orbital action where edge quality matters.
- Reduce feed pressure near corners and at the end of the cut.
- Protect the surface from shoe scratches with clean painter’s tape or a compatible nonmarring shoe cover.
- Support both the countertop and the waste section to minimize vibration.
- Practice on an offcut of the same construction when one is available.
Small chips around a sink opening are often hidden beneath the rim, but they can still expose the substrate to moisture. The fixture and countertop manufacturers’ sealing instructions remain relevant after the cut is complete.
Cutting a Countertop to Length
A jigsaw can trim a countertop to length, but it is harder to maintain a long, straight, square cut than with a properly configured straight-cutting saw. Blade deflection may leave the bottom edge offset from the marked line, especially through a thick core or a formed front edge.
If a jigsaw is the available tool, mark both faces, use a stiff clean-cut blade, support the full countertop, and clamp a straightedge only if the jigsaw’s shoe can run against it safely. Measure the offset between the blade and shoe edge before positioning the guide. The guide controls the tool’s path at the surface but cannot prevent the blade from bending below.
Postformed countertops may include a rounded front edge and an integrated backsplash. These profiles change the cutting angle and support conditions as the saw moves across them. Follow the countertop manufacturer’s instructions, and avoid balancing the jigsaw on a curved or unsupported section of the profile.
Troubleshooting Common Cutting Problems
The Laminate Chips Along the Top Edge
Confirm the blade’s tooth direction. A conventional blade cutting from the decorative face can pull chips upward. A blade intended for clean top-side cuts, or cutting from the underside where practical, can move the vulnerable edge to the less visible face. A dull blade, aggressive orbital action, vibration, and excessive feed pressure can also worsen chipping.
The Blade Wanders or Leaves an Angled Edge
Reduce forward pressure and check that the blade is sharp, straight, properly installed, and suitable for the countertop thickness. Keep the shoe flat. Thick substrates, flexible blades, tight turns, and abrupt directional corrections can all increase deflection. Do not force the blade sideways to bring it back onto the line.
The Jigsaw Jumps or Lifts From the Countertop
This can occur with a reverse-tooth blade if the downward cutting action pushes the tool upward. Stop the saw, disconnect its power source, and verify that the blade is installed correctly and intended for the application. During operation, maintain controlled pressure on the shoe without pressing so hard that steering becomes difficult.
The Cutout Breaks Before the Cut Is Finished
The waste section lacked adequate support or became too heavy for the remaining substrate. Use temporary cleats or supports beneath the opening before restarting. Do not reach under the countertop while the blade is moving.
Safety and Dust Control
Laminate countertop cutting produces chips and fine dust from the decorative surface, adhesive, and composite core. Wear eye and hearing protection, and use suitable respiratory protection based on the material manufacturer’s safety information and the working conditions. A dust blower clears the cutting line but does not collect airborne dust. Connect extraction equipment only through compatible ports and accessories.
Keep hands away from the blade path and the underside of the workpiece. Manage a corded jigsaw’s cable so it cannot cross the cut. For cordless tools, use the exact battery platform approved for the model. Disconnect the cord or remove the battery before installing a blade, clearing packed debris, or adjusting the baseplate.
Allow the blade to stop before setting the jigsaw down. Blades can become hot during cutting, so let one cool before removal. Replace bent, damaged, or heavily worn blades rather than attempting to straighten and reuse them.
Key Points for a Clean, Controlled Cut
Accurate laminate countertop cuts depend on blade direction, secure support, a correctly marked template, and moderate feed pressure. Drill starter holes for internal openings, support the waste piece before it separates, and keep the jigsaw’s baseplate flat. Low orbital action and a sharp laminate-compatible blade can reduce tear-out, but no setup guarantees a completely chip-free edge.
For sink and cooktop openings, preserve the template line and seal the exposed substrate as directed by the relevant manufacturers. For long cuts to length, recognize the jigsaw’s limits and watch closely for blade deflection beneath the countertop.
