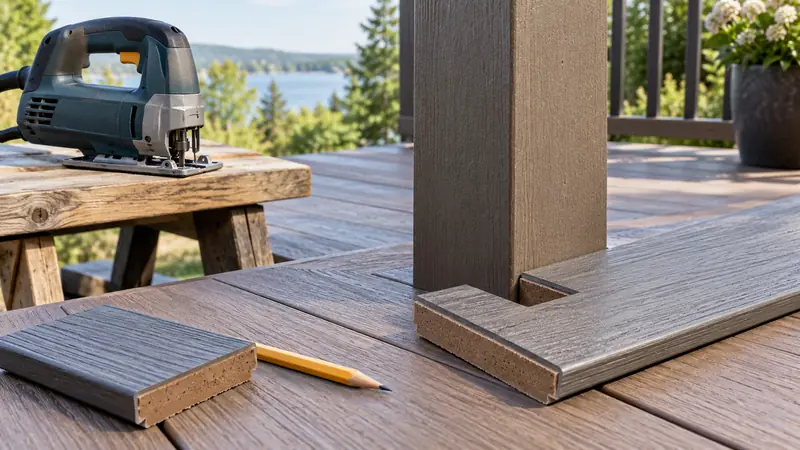
Use a jigsaw for composite-decking notches and curves when the board manufacturer’s instructions permit it. Identify the board’s formulation and cap layer, choose a blade rated for that composite and support the board so the waste cannot break away. Straight crosscuts and long rips may be better assigned to the tools specified for those tasks. Our jigsaw blades for composite decking comparison helps narrow the cutting edge once the material and method are confirmed. A general wood rating is not automatic evidence of suitability for every wood-plastic composite board.
Cut a Decking Notch Step by Step
- Identify the exact decking product and its permitted cutting method. Establish the required clearance around the obstacle and the remaining fastening details.
- Transfer the shape in the board’s installed orientation and mark the waste. Check the layout before moving the board to stable supports.
- Support the long board and offcut, then disconnect power before installing a compatible composite-rated blade and adjusting the tool.
- Check the full blade path underneath. Make accessible cuts with steady feed, using the permitted entry method for an internal opening.
- Stop before repositioning or removing waste. Inspect and dry-fit the board, then use only the edge-finishing method allowed for that product.
Identify the Board and the Installation Detail
Record the exact decking product, not just the brand. Solid and scalloped profiles, different cap layers and different composite formulations can change the support and finishing requirements. Look up the required gap around posts and fixed structures before marking a notch. The jigsaw follows the shape you draw; it cannot correct an opening laid out without the manufacturer’s movement allowance. Hidden fastener locations and minimum remaining material also need checking before a cut changes the board’s edge.
| Planned cut | Main question | Setup priority |
|---|---|---|
| Notch around a post | What clearance and remaining section are required? | Accurate transfer and supported waste |
| Broad curved edge | Is the curve and finishing method permitted? | Consistent support and a finishing allowance |
| Internal opening | Where can the blade enter safely? | Starter-hole position and access underneath |
| Long straight rip | Which tool does the manufacturer specify? | Stable support over the full board length |
| Cut near a groove or scallop | Will the remaining profile work as intended? | Check fastening and edge requirements |
Mark Clearance Before Marking the Cutting Path
Locate the fixed obstacle and determine the gap required by the exact decking system. Transfer that allowance into a template or measured layout, then mark the waste. Do not trace a post tightly and assume the blade kerf supplies the needed movement space. Required clearances belong to the product’s installation instructions and should not be guessed from another brand’s board.
Check how the notch relates to the fastening location and remaining board section. A cut that removes a groove or leaves a narrow strip may change how the board can be supported or secured. Resolve those details before cutting, especially near an end or scalloped portion. The jigsaw can reproduce the layout, but it cannot make an unsuitable remaining profile work as a fastening surface.
Choose a Composite-Rated Blade
Check the blade’s named application, working range and shank. WPC is a material designation that can appear in blade ratings; it should still be matched to the actual board. A blade suited to a broad curve may be too wide for a small-radius notch. Use a sharp blade and inspect it if the cut becomes labored. Do not assume a very fine tooth pitch produces the best edge in every formulation. Tooth geometry, chip clearance and the board’s cutting guidance belong in the decision together. Disconnect power before fitting the blade or changing the setup. Confirm that its full stroke clears the board and all supports below.
Lay Out the Notch from the Installed Position
Use measurements or a template to transfer the obstacle, keeping the board in its intended orientation. Mark the waste and the required clearance. Check the location against grooves, fastener zones and the board ends before cutting. An open notch can often be approached from the board edge. An internal opening needs an entry method suitable for the material and large enough for the blade. Do not plunge an ordinary blade into the board unless the tool and material instructions explicitly permit that operation.
Use a Clear Sequence for an Open Notch
First confirm the board identity, required gap and installed orientation. Mark the notch and waste, support the full board and offcut, then install the appropriate blade with power disconnected. Check the shoe route and underside clearance before starting. Make accessible cuts from the edge where the shape permits, keeping the retained section stable throughout the sequence.
At an internal corner, avoid driving past the line simply to free the waste quickly. Use the permitted entry or relief method and a blade that can negotiate the shape. Let the blade stop before repositioning the saw or removing loose waste. Dry-fit the board after inspection so any correction is based on an identified high spot rather than a series of unmeasured widening cuts.
Support Both Long Lengths and Small Offcuts
Long decking can rock or lever against a small support. Arrange supports so the retained board remains stable while the blade has a clear path. Keep the waste from tearing the final section as it separates. For capped surfaces, keep the shoe clean and evaluate the tooth direction on matching scrap. The principles in surface support and tear-out control help diagnose face damage, but the board maker’s instructions remain the starting point. Plan collection with the extraction connection and the material’s dust information. A clear visible line does not mean the dust is being adequately collected.
Cut the Curve without Forcing the Blade
Feed steadily at settings suitable for the blade and board. Avoid lingering in one place, which can add heat, or pushing sideways to correct the line. If the underside wanders, stop and reassess blade geometry and pressure. Trex’s cutting guidance treats the jigsaw as useful for curves and notches and includes finishing curved edges after cutting. Apply any sanding or edge treatment only as permitted for your product; do not copy a finishing method blindly onto a different cap layer.
Distinguish Heat Marks from Blade Deflection
A softened or smeared edge suggests a different problem from an underside that slopes away from the upper line. Heat-related defects call for checking the blade rating, sharpness and speed/feed combination. A sloping edge calls for checking side pressure, turning capability and support as well. Both can occur together, but one correction should not be assumed to resolve every defect.
Use a matching offcut to settle the setup before following the finished curve. Leave only the finishing allowance appropriate to the board and permitted edge treatment. If the saw needs increasing sideways force, stop instead of leaning harder into the guide or layout. After the blade stops and the tool is disconnected, inspect the setup and choose a more suitable blade or cutting route.
Inspect Before Fastening
Dry-fit the board and confirm clearance, edge quality and fastening details. Remove loose debris without damaging the cap or profile. If the notch is too tight, mark the interference and correct it deliberately rather than forcing the board around the post. Keep the trial piece and blade code with the project notes. Repeated boards then start from a known setup while still allowing for the actual shape and support at each cut.
Protect the Cap and Profile During Finishing
Some composite products have a cap layer whose appearance and permitted treatment differ from the core. Do not apply a broad sanding, routing or sealing instruction without checking the exact board. An edge that is hidden under trim may need a different cosmetic decision from an exposed curved border, but both still need the required installation clearance and support.
Inspect the finished notch before fastening makes access difficult. Confirm that it fits freely as required, the remaining profile accepts the specified fixing method and the surface has not been damaged by the shoe or clamps. Keep the setup notes with the project, including the product code and blade. A successful cut is most useful when its conditions remain identifiable for later boards.
