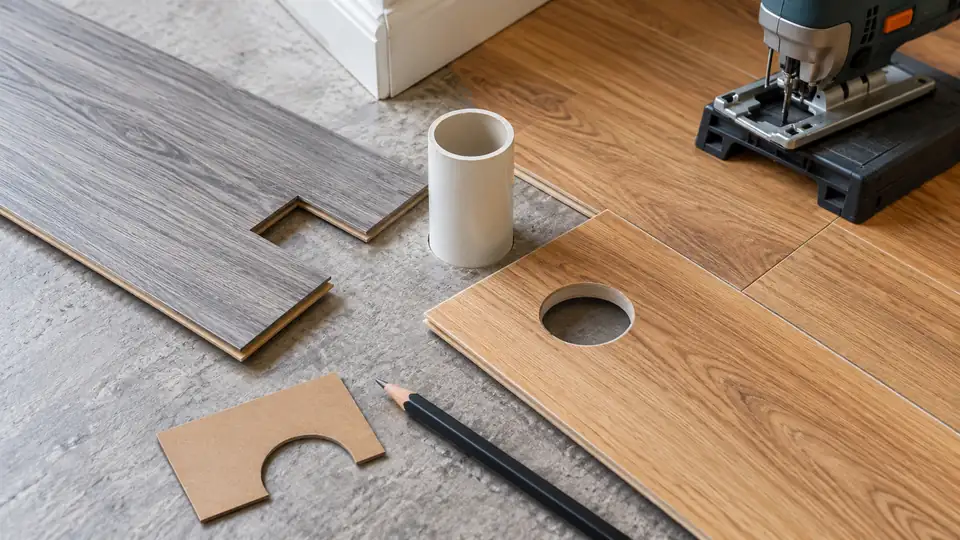
Use a jigsaw for flooring notches, pipe openings and curves after identifying the plank’s exact material and installation requirements. Laminate with a wood-fiber core and vinyl plank with a polymer or mineral-filled core do not automatically use the same blade. Mark the fitting allowance specified by the flooring manufacturer, support the plank and test the blade on a matching offcut. For wood-core laminate, start with blades for laminate flooring rated for the plank’s thickness and decorative surface. Keep the blade decision separate from the expansion-gap and joint requirements of the flooring system.
Plan the Flooring Cut in Order
- Identify the plank’s exact core and read the installation instructions for clearances, permitted tools and fitting around the obstacle.
- Mark installed orientation, the required opening and the waste. Verify the layout against the locking profile before turning the plank over.
- Secure the plank and offcut on stable supports, then disconnect the saw before fitting the appropriate blade and setting the shoe.
- Check blade clearance and make a matching scrap trial. Use a cutting route that avoids forcing tight turns or damaging locking edges.
- Let the blade stop before lifting the tool away. Inspect the cut and dry-fit the plank without forcing it or eliminating required movement clearance.
Identify the Core Before Making the First Cut
Check the carton, product code and installation sheet. “Waterproof flooring” does not identify the substrate. Laminate, flexible vinyl, rigid SPC and WPC products can have different cutting instructions, and those instructions may differ between collections from the same brand.
| Flooring type | What to establish | Why it affects the cut |
|---|---|---|
| Wood-core laminate | Core thickness and decorative surface | Tooth exit can chip the finish |
| Flexible vinyl plank | Whether scoring is approved for the cut | Simple straight cuts may not need a saw |
| Rigid vinyl / SPC | Exact core and permitted tools | Mineral content can change blade requirements |
| WPC-core plank | Manufacturer’s fabrication method | A vinyl label alone does not specify the cutting edge |
| Product of unknown construction | Product identity before cutting | Appearance is insufficient for choosing a blade |
Use the maker’s method for long straight cuts. Reserve the jigsaw for the shapes that make its maneuverability valuable.
Lay Out a Notch with the Joint Orientation Intact
Place the plank in its installation orientation and mark which edge connects to the previous row. Transfer the obstacle shape to a template if measuring directly would be awkward. Include the required movement clearance rather than cutting an exact friction fit against a pipe or fixed post. Mark the waste clearly. If working from the back to protect a face, transfer the layout carefully so the shape is not reversed. Check the tongue-and-groove direction again before cutting an expensive plank. For a pipe opening, use the installation system’s approved hole size and method of fitting the board around the pipe. A narrow jigsaw blade should not be forced around a radius smaller than it can turn.
Make the Fitting Sequence Explicit
Start by checking the manufacturer’s gap and fitting instructions, then place a template or measured layout against the obstacle. Mark the plank’s installed direction and waste before moving it to the cutting support. This order keeps the measurement connected to the locking profile and reduces the risk of making a correctly shaped notch at the wrong end of the board.
If a decorative face will be cut from below, transfer the shape carefully and verify it against the installed position again. For an irregular obstacle, a card template can be easier to check than several independent dimensions. Include only the clearance the flooring system calls for; do not invent a universal gap or assume trim can compensate for a notch that prevents the floor from moving as intended.
Choose a Manageable Saw and Support the Plank
A stable shoe, visible cutting area and controllable speed matter more than the largest capacity number. Compare jigsaws for laminate-floor fitting cuts if the current saw is difficult to maneuver around small notches. Clamp the plank to a suitable support, leaving the entire blade path clear underneath. Support a large offcut so it cannot snap away at the last corner. Keep the locking profile from being crushed by clamps or damaged by unsupported bending. Disconnect power before changing blades or adjusting the shoe. Use the protective equipment and dust controls specified for the material and tool.
Make a Short Laminate Trial Cut
Fit a laminate-rated blade of suitable length. Select the blade and saw settings recommended for the application, and test the tooth direction against the face that will remain visible. A reverse-tooth blade may help the upper face, but it also requires stable shoe contact. Cut just on the waste side of the layout where the installation detail allows. Let the blade advance without pushing it sideways into a tight corner. Stop the blade before removing the saw from the cut or setting it down.
Follow a Controlled Cutting Sequence
With the plank secured and power disconnected, install the compatible blade and set the shoe as required. Check clearance through the full route, including any internal corner. Position the saw for a supported start, then operate it according to the manual. Keep hands away from the underside and guide the shoe through the cut without pushing the blade sideways to meet the line.
For a notch, use separate approaches where the shape permits them instead of forcing one continuous tight turn. A small finishing allowance can be useful where the installation detail allows, but it must not consume the required movement gap. Let the blade stop before lifting the tool out or moving the plank. Inspect the locking edges as well as the cut surface before returning the piece to the floor.
Give Vinyl Its Own Blade Decision
Use jigsaw blades for vinyl plank flooring only after matching the blade’s material rating to your actual core. A blade intended for ordinary laminate is not automatically rated for every rigid vinyl or mineral-filled plank. Watch the trial edge for melting, smearing, cracking or crumbling. Correct the blade and settings before making the finished cut. A slower feed is not always cooler: dwelling in one place can add heat, while forcing the saw can overload the blade. Seek a stable cut that makes chips without damaging the edge.
Do Not Treat Every Rigid Core as the Same Material
Rigid flooring may contain different fillers and layers beneath a similar printed surface. A blade that behaves well in one collection is not automatically appropriate for another. The product code and installation guide are therefore more useful than the broad label “luxury vinyl.” If the maker specifies another cutting method, follow that method for the relevant cut.
Look at the trial chips and edge after the piece has cooled. Smearing or a softened bead calls for a different diagnosis from granular breakout or cracking. Check blade rating and condition first, then the support and speed/feed combination. Avoid repeated trial cuts in a finished plank while changing several variables; use a matching offcut and settle the setup before committing the installation piece.
Check the Fit Before Installing
Remove loose debris and inspect the locking profile, decorative face and notch corners. Dry-fit the plank without forcing it into place. Confirm that required movement clearance remains after the trim or pipe cover is positioned. If the edge chips, review controlling tooth exit and tear-out. If the opening is misplaced, correct the template or measurement process rather than widening it blindly. A successful fitting cut preserves both the appearance and the movement requirements of the floor.
Preserve the Locking System and Movement Clearance
A plank can fit around a pipe while still failing at the joint. Inspect the tongue and groove for crushed areas, loose debris or damage caused during clamping. Dry-fit in the intended direction without forcing the joint. If the board rocks or refuses to seat, check the cut and the manufacturer’s fitting sequence before removing more material.
Distinguish a hidden rough edge from a functional problem. Trim may cover minor cosmetic variation, but it does not correct inadequate movement space or a damaged locking profile. Where a cut exposes a layer needing product-specific treatment, use the flooring instructions. Keep the material identity and trial setup in the project notes so the next notch begins from the same verified approach.
