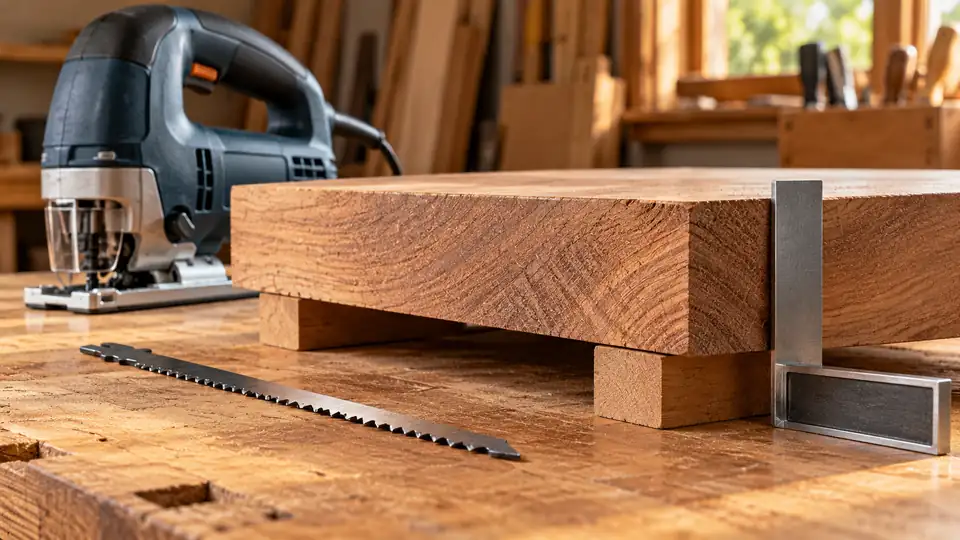
A jigsaw’s maximum cutting thickness depends on the exact saw, the material and the blade. Check the saw’s material-specific capacity and the blade’s rated working range, then confirm that the blade clears the underside throughout its stroke. A blade that can reach through the board may still bend too much to leave the square edge your project needs. For deep wooden curves, compare jigsaw blades for thick wood only after checking those limits. A longer blade increases reach; it does not increase the saw’s approved capacity.
Use Three Separate Checks
The saw’s manual establishes the tool’s stated capacity for wood, metal or another permitted material. The blade specification establishes its intended application and thickness range. The physical setup determines whether the blade tip can travel freely below the work. All three must fit. A long wood blade does not authorize the same depth in steel. A tool’s maximum wood capacity does not establish that a particular short blade can reach it.
| Dimension or limit | What to find | Mistake to avoid |
|---|---|---|
| Overall blade length | End-to-end blade dimension | Counting the shank as usable cutting reach |
| Usable or working length | Manufacturer’s usable cutting dimension | Treating every part of the blade as toothed cutting length |
| Stroke | Blade travel in the saw | Checking clearance at only one blade position |
| Workpiece thickness | Full thickness at the cut, including layers | Measuring only the visible face layer |
| Tool capacity | Material-specific limit for the model | Applying the wood limit to another material |
| Free space below | Clear path for the moving tip | Letting the blade strike a bench or hidden fixing |
Read the Material-Specific Capacity Correctly
A saw can list different limits for wood and metal because those applications place different demands on the tool and blade. Use the value for the actual material, not the largest number in the specification table. A model’s maximum wood capacity also does not establish that every wood species, blade or curve will produce the finish your project requires at that thickness.
Treat a capacity figure as an application boundary, not a promised result for every setup. A thick decorative curve may need a square underside and a small turning radius, which can be harder to achieve than simple separation of the stock. Define that result before deciding whether the maximum stated depth is relevant to the purchase.
Picture the Blade at Both Ends of Its Travel
The shoe rests on the top of the board. Part of the blade is held in the clamp, part passes through the work and the tip travels below it. At the top of the stroke, the tip still needs to remain clear of the work’s underside as required by the manual. At the bottom, it needs free space beyond that underside. Disconnect the saw before checking blade installation and clearance. Use the blade manufacturer’s dimensions and the saw manual; do not try to judge the moving tip by reaching beneath an operating tool. If the package supplies only overall length, find its application thickness rating rather than calculating a safe depth from that number alone. The clamp arrangement and usable tooth section can differ between blades.
Include Layers and Angles in the Measurement
Measure the full stack the blade must cut, including any permitted sacrificial support. Adding a backing board can change both reach and the material encountered by the teeth. Recheck clearance rather than assuming a blade that suited the original panel remains appropriate after the support arrangement changes.
A bevel changes the path through the work and the geometry beneath the shoe. Do not reuse a square-cut clearance check without considering that new position. Follow the saw’s instructions for blade selection and accessory limitations at the chosen angle. If the usable range or clearance is uncertain, resolve it from the documentation or choose another approved setup before operating the tool.
Why Deep Cuts Wander
A jigsaw blade is held at the top and projects into the work. As the unsupported length increases, sideways loading becomes more significant. Tight turns, forceful feed and an unsuitable tooth pattern can cause the underside to drift even while the top looks close to the line.
For a square edge, use a blade intended for the material and task, keep the shoe stable and allow the teeth to cut without forcing the tool. Check a trial cut from both faces. The guide to diagnosing blade deflection helps distinguish a setup problem from a damaged or unsuitable blade.
Read the Trial Cut from Both Faces
Draw a reference that lets you compare the upper and lower edges after cutting. A good top line with an offset underside points toward a different issue from a saw body that visibly leaves the layout. Check the blade’s suitability, condition and installed position before altering the guide arrangement. A guide can constrain the shoe while the blade still bends below it.
Use a trial long enough to include the difficult part of the shape. A short straight entry does not establish that the blade will remain square through a tight turn. Stop if the tool needs increasing sideways pressure to continue. Allow it to stop, disconnect power before inspection and reassess the curve and blade rather than treating extra force as the next setting.
Choose a Saw for the Cut You Need to Keep
When comparing jigsaws for thicker wood cuts, look beyond the largest capacity number. Consider blade guidance, control at a manageable feed and the blade choices available for the intended curve. The relevant result is the edge left in your material, not simply whether the tool can separate it. Begin with choosing a blade for the wood or board if the substrate or surface is uncertain. A thick hardwood curve, a deep softwood notch and an engineered board cut can need different priorities.
When Another Tool Is the Better Choice
Repeated deep straight cuts with demanding squareness may suit a different saw and support arrangement. Very tight curves may be incompatible with the stiffness needed at the required depth. Do not try to solve that conflict by twisting the blade harder. Before making the finished cut, verify:
- Material and thickness are within both saw and blade ratings.
- The blade is correctly seated and undamaged.
- The full blade path beneath the work is clear.
- Both retained work and waste are supported without trapping the blade.
- A trial cut meets the project’s underside and squareness requirements.
If the last check fails despite an appropriate setup, change the process before risking the finished piece.
Let the Required Edge Choose the Process
A rough opening hidden behind trim may tolerate an edge that a fitted joint cannot. Repeated straight components may call for a different process from a single broad curve. Write down the acceptable finish, squareness and shape before testing. Without those criteria, “the jigsaw cut it” is too vague to tell you whether the method succeeded.
If a supported, appropriately bladed trial still fails the requirement, preserve the finished stock and change the method. Possible alternatives depend on the shape, material and equipment available; no single replacement saw solves every task. The useful decision is to select a process that can produce the needed edge, rather than extending a jigsaw beyond its documented capacity or practical control.
