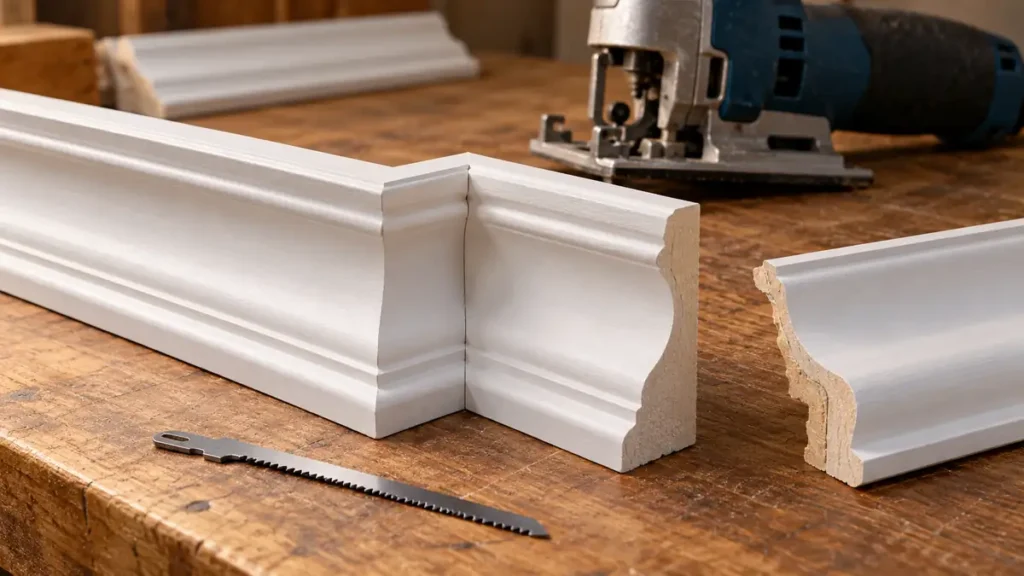
Coping molding with a jigsaw means following the profile of one piece while removing material behind the visible edge so it fits against the face of the adjoining piece. The clean front arris makes the joint; the back relief provides clearance. Success depends on a suitable blade, secure support and repeated test fitting, rather than forcing a narrow blade around the profile in one pass. For this work, compare jigsaw blades for coping trim by profile detail, molding material and turning ability. A blade that turns tightly in thin stock may behave differently in a deep or layered molding.
Follow the Coping Sequence
- Label the molding’s installed orientation and make the initial cut appropriate to the profile and joint. Mark the visible arris and waste clearly.
- Check a short mating sample and plan which sections the jigsaw can reach without forcing the blade through a tight detail.
- Clamp the molding securely, support long lengths and disconnect power before installing the blade or any approved coping accessory.
- Remove the waste in manageable sections, preserving the front edge and providing the required clearance behind it.
- Stop the tool before repositioning. Test the joint in its installed orientation, correct identified high spots and establish the fit before cutting the final length.
Understand What the Cope Must Preserve
For a typical inside-corner cope, one piece meets the corner square and the other is shaped to its face. An initial miter on the piece to be coped reveals the profile where the finished face meets the cut surface. Mark that edge clearly; it becomes the reference you preserve during cutting. The exact initial cut depends on the molding and joint. Crown molding also requires attention to its installed orientation. Label the wall side, ceiling side or finished face before moving a complicated piece to the bench.
| Part of the profile | Goal | Useful check |
|---|---|---|
| Visible front edge | Follow the mating shape | Compare directly with a short sample |
| Material behind the edge | Provide clearance | Look for hidden interference during fitting |
| Small beads and hollows | Preserve detail | Avoid steering a wide blade through an impossible radius |
| Thin projecting tips | Prevent breakage | Support close to the cut without obstructing it |
| Finished joint | Close at the face | Remove high spots behind the arris, not the visible outline |
Mark the Arris Before Removing the Waste
The arris is the line where the finished face meets the cut surface revealed by the initial miter. Emphasizing it with a pencil can make the profile easier to distinguish from the waste behind it. Keep the mark narrow enough to retain the reference rather than covering the detail you need to follow.
Inspect how each bead, hollow and flat meets the mating sample. The visible outline and the required relief behind it are related but different. Removing a hidden high spot may close a joint without changing the front profile. Removing the arris to solve that same interference can create a permanent visible gap. This distinction is the basis of controlled test fitting.
Choose the Blade and Saw as a Controlled Pair
A narrow blade can follow a tighter shape, but it also needs careful feed and support. Check its shank, length and material rating. MDF trim, solid wood and plastic molding should not be treated as interchangeable simply because the profile is the same. If choosing a saw, compare jigsaws for coping around grip, low-speed control and access to the cut. The explanation of barrel-grip and D-handle control layouts helps relate switch position to the way you hold the work and tool. Start on scrap of the same profile. A successful simple curve in flat board does not prove that the blade can negotiate a deep molding’s small hollow.
Use a Sample with the Full Profile Depth
A flat offcut checks only part of the problem. Use a short length of the same molding to evaluate the blade through the deepest portion and the smallest detail. The blade may turn readily at the thin edge while resisting the same turn where the profile becomes thicker. Check the underside of the cope as well as the visible face.
Keep the blade rating matched to the actual molding material. Painted solid wood, MDF and plastic profiles can look similar after installation but present different cutting conditions. A blade selected only for narrowness may not suit that material. Where a detail is too small for a controlled powered cut, leave material for an appropriate finishing tool rather than twisting the blade sideways.
Treat a Coping Foot as an Optional Model-Specific Accessory
A coping foot can change the contact geometry at the work. It is not required for every cope, and it must be designed for the exact saw. Compare coping feet for jigsaws using the accessory maker’s model list and installation instructions. Collins, for example, distinguishes its universal-foot compatibility list from a separate CARVEX arrangement. Similar appearance is not enough to establish fit. Check the exact saw model and use the specified hardware. Do not improvise mounting or remove protective components contrary to the instructions. Disconnect power before changing the base or blade. After installation, check that the blade moves clear of the accessory and that required guards and controls function correctly.
Cut the Profile in Manageable Sections
Clamp the molding with the cut accessible and the blade path clear. Support long lengths so they cannot lever the profile out of position. Mark the waste and work in sections where doing so avoids a forced turn. Preserve the visible edge while creating the required relief behind it. Do not apply a universal back-bevel angle to every molding: the profile and fitting check determine where clearance is needed. If a detail is too tight for the blade, stop and use an appropriate finishing tool rather than twisting the moving blade sideways. The principles of controlling a curved jigsaw cut still apply. Turn the saw through a suitable path, keep the work stable and let the teeth remove material.
Follow a Deliberate Coping Sequence
First label the installed orientation and expose the profile with the appropriate initial cut. Next mark the arris and waste, clamp the molding and verify clearance. Install the compatible blade with power disconnected, then make accessible portions of the cope in a route that avoids forced turns. Keep the retained edge supported and allow the blade to stop before repositioning the work.
Where relief cuts help, keep them in the waste and stop short of the finished line. Their purpose is to let waste separate in manageable pieces, not to cut a series of notches into the arris. Follow the accessory instructions for support and orientation if using a coping foot. Do not apply an unfamiliar attachment technique merely because it makes a difficult profile appear accessible.
Test the Joint Before Shortening the Finished Piece
Use a short mating sample to identify interference. Mark the high spot, remove a little material behind the front edge and fit again. A visible gap is not always fixed by cutting more from the visible line; the back of the cope may be preventing the pieces from meeting.
Check the joint in its installed orientation. Once the cope fits, measure the remaining length and finish the other end as the installation requires. This sequence preserves room to refine the joint instead of turning a small correction into an undersized piece.
Diagnose a Gap without Erasing the Profile
Bring the pieces together in their intended installed positions and identify where contact occurs first. If a hidden ridge prevents the face from closing, remove that ridge rather than trimming the visible outline. If the front profile itself is wrong, mark the exact location and make a small controlled correction. Recheck after each change.
A joint can also appear wrong because the sample is tilted or the molding is not held in its installed orientation. Confirm the setup before removing more material. Once the cope fits, protect it while measuring and cutting the remaining length. Keeping those operations in sequence preserves the opportunity to refine the joint without leaving the entire piece too short.
