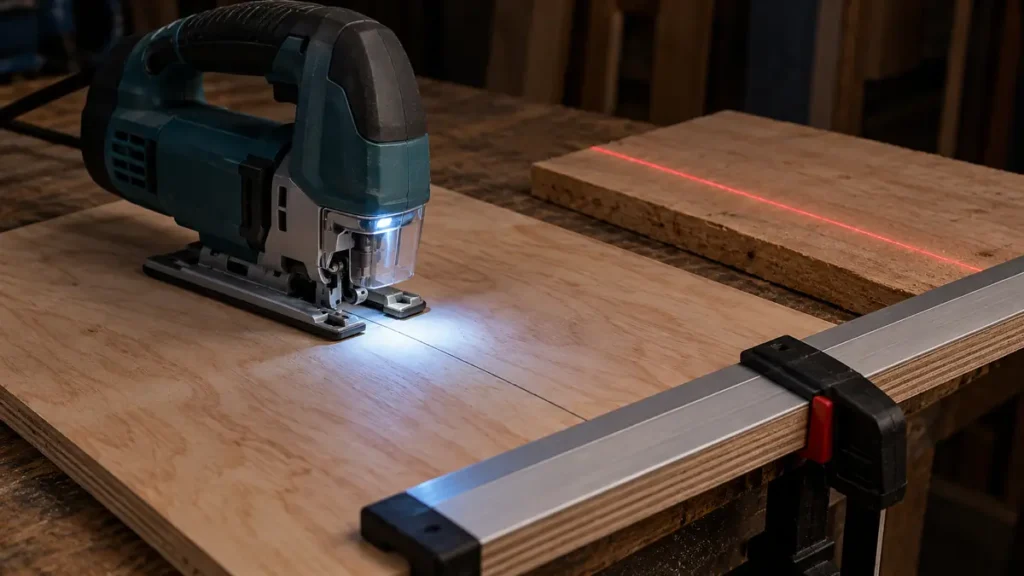
An LED helps you see a cut line, a laser projects a reference and a straightedge provides physical guidance for the saw’s shoe. They solve different problems. None replaces a suitable blade, stable work support or controlled feed, and a projected line cannot keep the blade square beneath the workpiece.
If you want a visible projected reference, compare jigsaws with an integrated laser by their actual alignment procedure and controls. Choose the aid because it addresses a visibility problem, rather than expecting it to correct every source of cutting error.
Separate Seeing, Aiming and Guiding
A dark pencil line under poor lighting can be difficult to follow even with a stable saw. A bright line can still be followed inaccurately if the blade is pushed sideways. A straight shoe path can also leave a sloped underside if the blade deflects.
| Aid | What it provides | What it cannot control |
|---|---|---|
| LED work light | Illumination near the blade and layout | Shoe direction or blade deflection |
| Laser reference | A projected alignment line | Mechanical sideways movement |
| Shoe notch or mark | A reference near the cutting area | The actual edge under every blade and bevel setting |
| Clamped straightedge | A physical reference for the shoe | An unsuitable blade bending below the surface |
| Compatible guide attachment | A defined connection to a guide | Material support or incorrect feed pressure |
Identify which part of the cut is going wrong before buying a feature. Difficulty seeing the line and difficulty maintaining squareness need different remedies.
Identify Which Part of the Cut Is Failing
Watch the reference you can safely observe during the cut, then inspect the finished piece after the tool stops. If the layout disappears under debris, visibility is the immediate issue. If the shoe leaves the intended route, guidance or feed may be involved. If the upper edge is straight while the lower edge slopes, the blade can be deflecting despite an apparently accurate path.
This diagnosis determines which aid is useful. Extra illumination can make a line easier to see without correcting a loose guide. A straightedge can stabilize the shoe route without correcting an unsuitable blade. A laser can provide a projected reference without supplying either physical support or a measurement of the underside. Avoid buying all three to solve a fault that has not been identified.
LED: Improve the View without Changing the Layout
An LED can help in a cabinet opening or shaded work area. Check where the light falls with your normal grip and cutting posture. A hand, dust hood or surrounding object can affect the view even when the tool has a bright lamp. Keep the lens and cutting area clear using the maintenance method in the manual. Do not reach near a moving blade to brush away dust. A blower may clear the line, while extraction collects debris; these functions are also different. A light does not require recalculating the layout. You still follow the marked line or the reference established by a guide.
Check Visibility in the Intended Work Area
A light that works well on an open bench can behave differently inside a cabinet or beside a raised edge. The saw body, your hand or the dust attachment can create shadows. Consider the position from which the tool is normally controlled, and improve general work-area lighting when the tool’s lamp does not illuminate the needed reference.
Keep the layout legible on the actual surface. A pencil mark suitable for pale plywood may be difficult to distinguish on a dark coating. Choose a marking method that does not damage the finish and test any tape before use. Do not lean into an unsafe posture or reach near the moving blade merely to compensate for a poor view.
Laser: Verify Its Relationship to the Blade
Use the saw’s alignment procedure. A projected line can be offset or require adjustment, and blade changes or a different cutting arrangement can affect the reference you should follow. Check on scrap before making the finished cut. Do not look into the beam or direct it at others. Follow the laser instructions, including restrictions concerning reflective work surfaces and adjustment. If the tool requires service for the laser, do not improvise modifications. A laser is especially limited on a curve: a straight projected reference cannot draw the changing route for you. It may help with aiming, but the marked curve remains the relevant path.
Check the Reference with the Actual Configuration
Use the manual’s procedure to establish where the projected line sits relative to the intended cut. A new blade, bevel position or accessory arrangement deserves a fresh check where the instructions require it. Do not assume that the beam represents the same edge of every blade or that a line coinciding with a pencil mark guarantees the desired finished dimension.
Make the check on a suitable trial piece rather than the finished part. Compare the resulting kerf with the reference and confirm the layout method before proceeding. If the laser cannot be aligned as specified, use the appropriate service or alternative reference described by the maker. Treat it as an aiming aid, not a reason to alter protective components or improvise the optical assembly.
Straightedges: Set the Offset from the Actual Cut
Compare physical jigsaw guides by compatibility and the way the saw contacts the guide. A straightedge clamped beside the shoe is different from an attachment that locates the saw on a rail. Neither should be assumed to fit because it works with a circular saw or router.
For a simple straightedge, establish the distance from the guiding edge of the shoe to the cutting edge with the blade and setting you will use. Make a trial cut, then position the guide so the finished edge lands correctly. Keep clamps clear of the shoe and blade path. Feed without forcing the shoe hard sideways against the guide. Excess pressure can encourage blade bending while the saw body continues along a straight route.
Guide the Shoe without Pushing the Blade Sideways
Position the straightedge using the measured relationship between the contacting shoe edge and the actual cut. Clamp it securely outside the tool’s route and check that the shoe can remain supported from entry to exit. A guide positioned accurately at the start can still be inconvenient if a clamp blocks the last part of the pass.
Apply controlled forward feed while maintaining the intended contact. Excessive sideways pressure can make the body follow the guide while the blade bends through the material. Check a trial from both faces, particularly in thicker stock. If a specialized attachment is used, follow its mounting and blade requirements instead of assuming it behaves like a simple straightedge resting beside the shoe.
Diagnose the Finished Cut from Both Faces
If the saw drifts at the top, inspect the reference, guide attachment and feed. If the top is straight but the bottom slopes, inspect blade suitability, shoe setting, guide condition and pressure. If the line disappears, improve lighting or debris control. Follow the operating sequence in how to cut straight with a jigsaw once the visibility and guidance arrangement is chosen. For repeated long, demanding straight cuts, assess whether another saw suits the work better.
A useful buying order is to fix workholding and blade choice first, then add the aid that addresses the remaining difficulty. Better visibility helps you react; physical guidance helps control the shoe; a sound cutting setup is what lets either benefit the finished edge.
